Thursday, September 29, 2016

Lime Plaster - First Coat

First off, a word of caution: lime plaster is caustic and you won't even feel it burning your skin.  It's not instantaneous, so you have time to neutralize any lime that gets on your skin with vinegar (which is acidic and neutralizes the basic lime).  Keep a bucket of 1 part vinegar to 10 parts water at the ready to clean yourself at regular intervals, and your tools before the lime starts to harden on them.  Wear eye protection when mixing the plaster, thick chemical gloves when working with it, and long sleeve shirts, and long pant at all times.

This is not intended to be a complete list of safety precautions: you MUST research how to work with lime plaster safely before embarking on these techniques.  Hopefully I have instilled a respect for the material and the importance of knowing how to work with it safely.

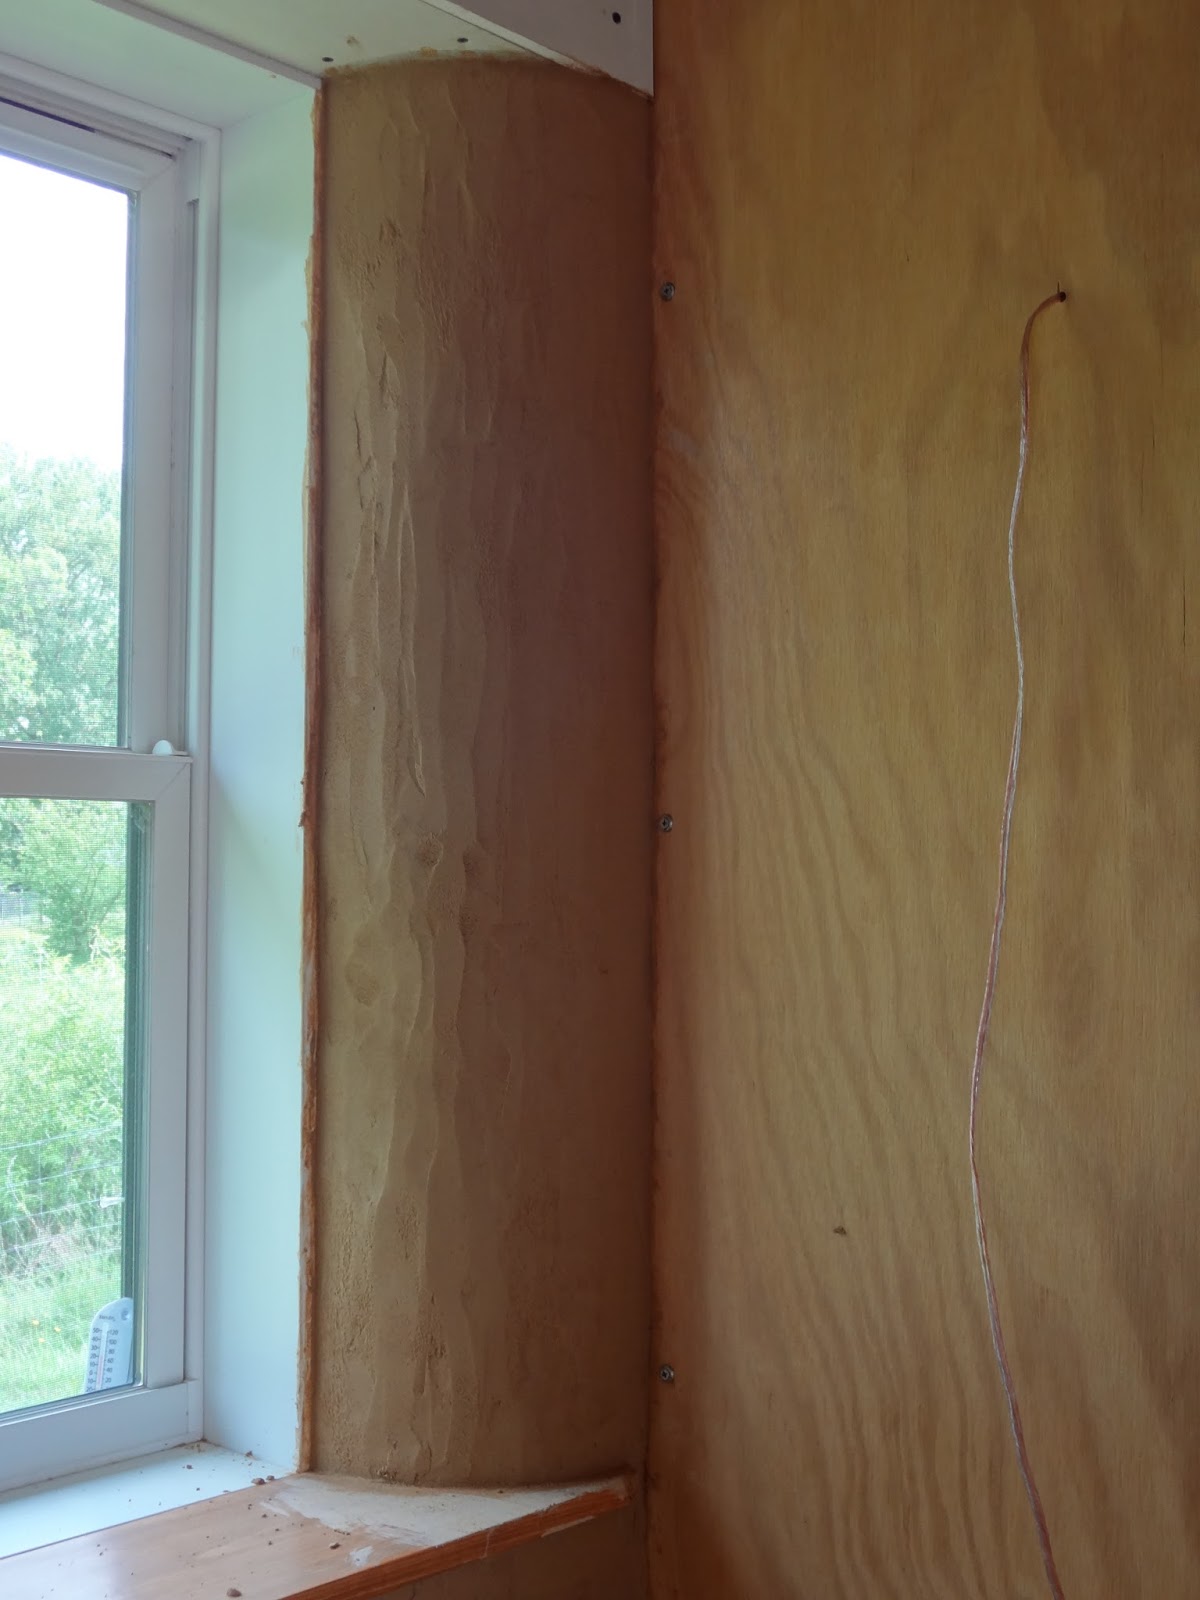
Now, on to the fun!  There were two aspects to the first coat.  First was to coat the light straw clay (LSC).  This was done the same way as the first coat of clay plaster: take handfuls of plaster in your gloved hands and mash it onto the surface of the LSC.  The intention is to get it fully bonded into the straw; we'll worry about making it flat in the next step.  I didn't take photos of this step in-process, since it is the same as clay plaster.

LSC covered in lime plaster.  Note that the wood sill and lintel have been taped off--
a precaution that I didn't need to take with the more benign clay plaster.
 The second task was to get a coat of lime plaster bonded to the lath.  Starting from the top, each trowel-full would get worked up into the last batch.

Note that I taped off the blocking at the top of the wall to maintain a clean line.
Make sure to press hard enough to squeeze the plaster through the lath.

Plaster is finished and relatively smooth.  Grooves were cut into all plaster
with a hair pick, just as I did with the clay plaster (Thanks again for that idea, Bob!).  Those pipes are stub-outs for the shower fixture.
I didn't plaster all the way to the bottom of the wall so I could staple the expanded metal lath to strengthen the
wall-floor transition.  I'll want to make this in one continuous pour  to minimize the potential for leaks at the corner.

Thursday, September 22, 2016

Lime Plaster Preparations

It's been a while, eh? I ended up taking off a good chunk of the summer for various reasons, but it's time to take advantage of the more reasonable temperatures and get back to work! This post is all about preparing the bathroom for lime plaster. Unlike clay plaster, lime can stand up to regular wetting once it is waterproofed with olive soap (more on that later). Below are various photos I took along the way.

Getting started at the bottom showing the tools of the trade.  

Note the short bits of lath used to provide the gap between sticks.

I placed two nails at each stud location: the first was with the nail gun,

which is quick and avoids splits in the ends.  The second was a stainless ring nai hammered by hand.
The larger head and extra gripping power is good protection against the final
wall pulling off from the studs in one big sheet.

Some areas couldn't be nailed due to the steel plates

that protect the plumbing.
This plywood section covers up the blocking that is in place
to support any cabinetry I may want to install in the future.
(I'm planning to build a bank of shelves to start with.)

Blocking between the i-joist flanges will get painted to match.
This will make  for nice finished look at the top of the wall, with the
ceiling panels sitting on top.

A temporary stop to create a clean edge for the lime.  After the wood strip
is removed, the final adobe will be toweled flush with the lime.

Making sure I don't drop any gobs of plaster  in the toilet riser pipe.

I made a small lath mock-up and spread a
test mix to see what it feels like.

I was especially curious to see how hard it is to achieve the "key",
where the plaster oozes through the slits in the lath.  Once hard,
this really locks the plaster onto the lath.


Tuesday, June 28, 2016

Interior Doors

Pretty quick when there are only two in the whole house! 

You can see that I pulled off the moldings that came with the doors.
I'll be using 1x3s to create a custom molding in a pattern that (hopefully) works with my various plywood, built-in, and tongue-and-groove wall components.

Clay Plaster Straightening Coat is DONE!

There's not a lot for me to say about these, but note that I used a flash which washed out the clay color a bit.  It's browner and warmer than it looks here.  The final thickness is about 3/8 of an inch and I'd estimate that it's flat to within 1/8 of an inch.  The idea isn't to get this layer picture-perfect.  #1, that would involve much more skill than I have, and certainly more patience.  #2, the final pigmented layer will cover up the blotchiness and some of the smaller imperfections.  #3, clay plaster is supposed to have natural variations and texture: it's organic, not manufactured.

Looking northeast (future kitchen)

North wall with blocking for wall cabinets

Looking northwest

West wall

Note the wet clay (darker) on the South wall to the left

South wall

Closeup of a window round before final smoothing

Detail around the electric panes, showing the transitions to drywall.
These will get further smoothing with drywall mud

This is how I blocked out the truth window.  The plexiglass is screwed in,
and this 1/2 thick styrofoam form is taped in place to allow me to create a clean
line with the straightening coat.

Porthole screwed in place on top of the still-soft straightening coat to
mold the clay to fit to the metal rim.

Porthole closed
(See what the clay looks like in natural light, rather than with a flash?)

Saturday, April 23, 2016

Clay Plaster - Scratch Coat

I'm finally starting on the clay plaster!  I've enjoyed the Light Straw Clay (LSC), but I've also been looking forward to covering it up.

This is the before photo.  Note the 3/8" plywood at the top of the wall covering the blocking for the kitchen cabinets.  The plaster will be flush with this.

 luckily, the mortar mixer fired up after several months of non-use without major drama.  Clay: this is the same clay soil I used for the floor, screened through 1/2 wire mesh, soaked in a bucket for several hours (several days is better), and given a preliminary mix with my double auger mixer.  Concrete sand (vs masonry sand)  is used because it has varying grain sizes that lock together more compactly.  I'm still not sure about the wheat paste: it didn't seem to make the mix stickier or more workable, as is claimed.  That will warrant some further experimentation.  One mix is enough to keep one person busy for the rest of the day. This turned out to be five 5-gallon pails filled 1/2 full.

Ready to start applying.  The LCS has been pre-wet to the right of the taped electrical box.  I used my paint sprayer, just spraying potable water and that turned out to be a great way to get controlled coverage (and good for me to practice my wrist technique).  I made one pass 10 minutes or more before stariting, and a second pass right before plastering.  I started out using the trowed to apply the plaster to the wall, but we quickly found that hands work better.

Two sections done.  This is called the scratch coat, as I'll explain later.  The goal is to get the best possible adhesion to the LSC, so we paid the most attention to pressing the plaster into the interstices of the LSC. Apply a handful smearing it up the wall.  Get a section roughly coated, and then come back and press it down with a sort of jiggly motion to lock it into place.  (Same as applying lime plaster to lath.)  The downward motion leaves some lumpiness that is easy to smoothout with some light upward or sideways strokes.  

We put some effort into leaving a uniform thickness, which is really pretty easy if the wall was well formed.  These sections were quite flat, but some later sections were less regular, so the scratch coat sort of half evens out the variations.  The straightening coat, coming next, will finish that process.  This scratch coat was only just thick enough to cover the majority of the straw.  Just a few stalks are left visible on the surface.

The corner was a bit of an experiment.  I started from the top with expanded metal lath stapled into the wood studs.  The lath started out thick at the top (3" per wall) and got progressively thinner toward the bottom.  You can see about 2" per wall in this photo.  The very bottom involved burlap placed into a thin layer of wet plaster.  You can see that it's pretty wavy, and it was a pain to get it to wrap the corner, so I'm leaning toward the lath as my final solution.  Since this corner is in my pantry closet, I'm less concerned with the look of it.

Regarding the exposed studs, I will deal with them with the straightening coat.  First, I'll place a skim coat of plaster over the wood, bridging the adjacent scratch coats.  Then I'll press a 6" strip of burlap into that wet mix and let it dry for several hours or perhaps overnight.  Then I'll come back  and lay the scratch coat over the entire wall, getting it as smooth and level as I have the desire and patience for.


 So that's what we completed by the end of the day.  Not too shabby, and more rewarding than the adobe floor, which involved a lot of loud mixing and laborious troweling.Clay plaster is still laborious, but at least you are standing up about 2/3 of the time.

The final task is to scratch up the surface to give leave a good texture for the next layer to adhere to.  Unfortunately, my closeup photos didn't come out.  At Bob's suggestion, I tried out a hair pick and it was the perfect tool!  Just pull horizontally and you get a nice pattern of 1/16" to 1/8" grooves.  I tried a diamond pattern, but that seemed to rough up the mix too much.

This is the wall after two days of drying.  I find it interesting that two of the sections are notably wetter than the others, since they all seemed to be the same thickness of clay.  I guess not.  In the  darker panels, you can see the scratch patterns: diamond on the left, and horizontal on the right. After 4 days, it was completely dry.  Interior conditions were in the low 60's with relatively low humidity.


Saturday, April 9, 2016

Compressed Earth Block Workshop

This natural building technique is relatively new to me, so I wanted to make some test blocks to see if they would work out for the finished surface of my porch. My first attempt was a failure after using the very clayey soil that I've used for the adobe floors because I couldn't get the cement mixed in with the soil adequately.  I found a source of a looser soil that still has a relatively high clay content.

Regardless, the first step is to pass the soil in the 1/4 screen to loosen it up. 
Interestingly, the water content in the soil was pretty high in the morning, but
by afternoon, it had dried out much more than I would have expected.

This is the mixing bucket.  We tried three recipes with varying ratios of cement (1:7, 1:11 and 1:15), and you can see the scale's readout that allowed us to measure precisely.  

This is one of the 1:11 mixes.   After mixing this thoroughly, we also added water to get the mixture to the optimum moisture content (more water was needed as the day went on).  It took some practice, but we found that if you squeeze a handful of mixed soil, it should form a coherent ball, and that ball should shatter when dropped onto a hard surface from about 6 feet high.

This is the simple mold: 2x4 sides screwed onto a 2x8 base.  The first blocks were pretty thin, so we ended up filling it, compacting it slightly by hand, and then re-filling.  Next time, I'll try 2x6 forms to save that step.  (FYI, to make a large number of blocks, you can buy a human-powered press, or gas-powered pneumatic presses.  Since I'm only going to need a few hundred, that's not worth it for now.)

Here, we're compressing the blocks with a hand-tamper hammering on a 3" thick board that fits inside the molds. It only takes about a minute of non-strenuous pounding, and you can feel when you are getting diminishing returns.  You can also hear the difference when it's time to stop, but that is pretty subtle.

I was surprised how hard it was to get the blocks out of the mold.  
We needed to remove two sides, or it was just too sticky to come out whole.

Knocking it with a hammer helped free the block.

 An array of block after a few days of drying.  Since the recipe includes cement, they should be kept shaded and moist, and they won't achieve their full strength for a month.  I've left a couple random pieces out in the rain, and they've held up with no visible degradation.  Once they've all cured, I'll try some compressive tests on dry samples and soaked samples, comparing the results of different cement contents.  

Many thanks to Kate and Bob for the photos and assistance!


Tuesday, March 22, 2016

Drywall above the Windows

The interior walls, made of light straw clay (LSC), will be covered in clay plaster.  For the finish coat, I've decided to use an American Clay, pigmented product.  This should make for an easy and predictable finish coat.  I really like how informative their website is, complete with detailed videos.  Check them out at americanclay.com.

I've mentally tried out various techniques to deal with the areas above the windows and for the window sills.
This photo shows the plastic above the windows, which holds in the cellulose insulation.  This needs to be covered before I can plaster it.  Since American Clay can be applied over drywall, I decided that would be a relatively easy way to create a uniform finish coat, with a consistent look over both the LSC and the drywall.

Above the kitchen window, the drywall (and later, the finished plaster) gets notched for the I-beams, which are exposed.

This is a test section of ceiling showing the brown beams and off-white ribbed panels.

Above the closet, the beam (still unpainted here) runs along the top of the drywall and marks the top edge of the clay plaster.  The off-white panels will sit on top of this beam.

This shows the south windows.