Sorry for the long silence! I've been distracted with other projects, lots of work, and a long sailing adventure, but I'm starting to devote some more time to finishing up the little details of the interior. Here is the coat rack I just installed:
The wood assembly is made of stained pine, which mimics the other trim in the house. Three metal hooks are screwed to the wood, and the whole assembly is screwed to the wall. This is not particularly noteworthy, but if offers an opportunity to talk about various procedures to hang things on the walls in a natural house.
Reminder: the interior walls have about 1/2" of clay plaster on top of 3.5" of Light Straw Clay, which is packed between conventional 2x4 studs. This is somewhat analogous to drywall in that if you want to hang something heavy, you'd better find a stud. Clay plaster by itself, like drywall, is limited in the weight it can safely support.
The coat rack may have to carry 15-20 pounds, so it is screwed into two studs. Fortunately, I was thinking ahead and marked all the stud locations before plastering over them. In my house, you just need to push up the ceiling panels, and my marks are visible in the plywood that lines the perimeter of the cavity between the first floor ceiling and attic floor. Use a plumb bob to project the marks down to the portion of the wall where you are looking to drive a screw. (Fortunately, I hired expert framers and this house is amazingly square, level and plumb!)
I used 2-inch long #8 screws that are counter-bored into the pine, meaning they bite 1" into the studs (1" bite + 1/2" of plaster + 1/2" of wood = a 2" screw). 1" of bury is more than really necessary, but 1 1/2" screws would have only had 1/2" of bury, and that would have left me a little nervous. I drilled a pilot hole for the screw and didn't bother with drilling a clearance bit through the plaster--it is soft enough that the screw drives right through the plaster with minimal effort.
I've only hung a few pictures and paintings where the weight is carried by the plaster. The super-light one is just hung on a nail. The medium one is on a standard hook nailed into the plaster, and the biggest, heavy painting has twin hooks nailed into 2 studs. My intuition says that the clay plaster has maybe 1/2 to 2/3 the carrying capacity of drywall, which means you should choose a bigger nail/hook than you would for a conventional wall.
There's nothing significant about any of that, except that I was a little nervous about nailing into the plaster, worrying that it might be brittle and crumble. Point #1 is that I did the nailing in the summer when the air is more humid and perhaps the clay is a softer and less brittle. Point #2 is that I used a small paintbrush to wet the wall where I was going to drive the nail. And I kept re-wetting it every 5 minutes or so for 20-30 minutes to pre-soften the clay. At this point ,the nails drove in quite easily, and I let the clay dry completely before hanging the art on the hook.
With this methodology, it took a little longer to hang the art than it would have with a conventional drywall wall, but there have been no oh-crap moments. If I had mock-up Light Straw Clay and drywal wall sections, I would do some destructive testing where I installed different size nails and hooks and hung weights on them until the fittings pulled out. Alas, I wasn't thinking ahead on that, so that will have to wait until the next project.
Wednesday, December 5, 2018
Tuesday, September 26, 2017
Mostly Moved In
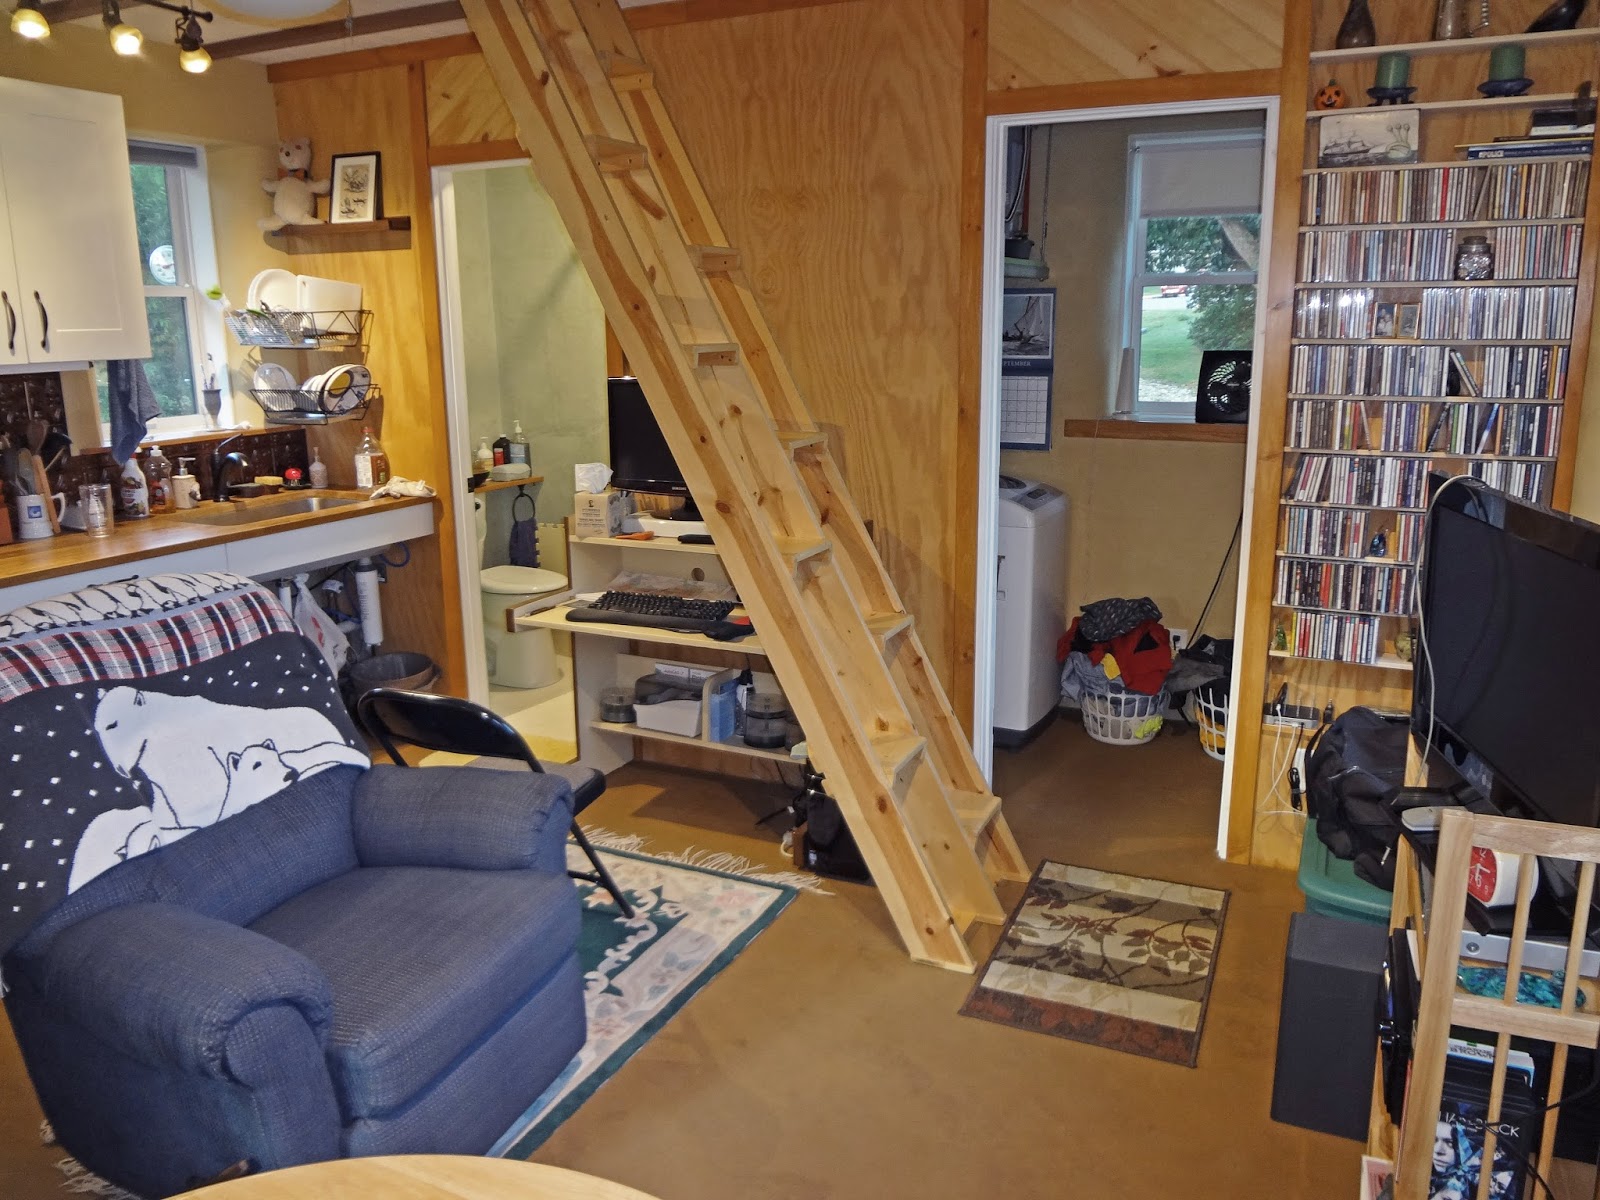
I moved in about two months ago and have been working on some of the small details: interior trim, shelves, shades, etc. I'm happy to report that I DO NOT FEEL CRAMPED! In part, that is due to my strategy of only moving in the things I need for the space I have available. Trying to downsize from my old cottage by just emptying the old place (800 sf plus attic) and trying to stuff it into 420 square feet would have resulted in an entirely different outcome. So please enjoy the following photos and consider what's done and what is yet to be finished:
Tuesday, June 20, 2017
Toilet Hand-Wash Basin
One of the space-saving features in my bathroom is that there is no sink. There are toilets for sale that incorporate a hand-wash basin in the back of the toilet (check out caromausa.com). When you flush, the water that refills the tank is routed through a faucet, giving about 30 seconds to wash your hands before the tank is full and the flow shuts off. The basin simply drains into the tank, meaning the grey water from washing your hands is used for the next flush. There are also kits for sale that allow one to retrofit most toilets in a similar fashion.
I ended up building as solution that functions the same way using an Ikea salad bowl as the basin. I like that I have a shelf the entire width of the bathroom to maximize the amount of available horizontal space.
Building Codes require that a bathroom have a sink available with warm water. This turned out to be the only sticking point in getting my building permit since a conventional toilet is only plumbed with a cold water supply line. The solution was to add a mixing valve so the water that fills the toilet tank via the faucet is automatically mixed to come out warm. This should have the benefit of keeping the toilet tank from sweating as much in the summertime. One unintended and undesirable consequence of this is that the valve seems to reduce the pressure to the faucet, so it is pretty much just a trickle when it comes out. The video shows it in action, but be aware that I didn't shoot for the entire 30-second fill cycle in case you don't have sufficient bandwidth to download a long video.
I ended up building as solution that functions the same way using an Ikea salad bowl as the basin. I like that I have a shelf the entire width of the bathroom to maximize the amount of available horizontal space.
Building Codes require that a bathroom have a sink available with warm water. This turned out to be the only sticking point in getting my building permit since a conventional toilet is only plumbed with a cold water supply line. The solution was to add a mixing valve so the water that fills the toilet tank via the faucet is automatically mixed to come out warm. This should have the benefit of keeping the toilet tank from sweating as much in the summertime. One unintended and undesirable consequence of this is that the valve seems to reduce the pressure to the faucet, so it is pretty much just a trickle when it comes out. The video shows it in action, but be aware that I didn't shoot for the entire 30-second fill cycle in case you don't have sufficient bandwidth to download a long video.
Monday, June 12, 2017
Steps up to Porch
Not much to say here, I'll let the photo captions speak for themselves.
| Laying out three steps. Each one will have four stones, and they will be angled slightly as they drop down to driveway level |
| All three steps boxed out and compacted. |
| Beginning to bed the steps in 1-2" of sand |
| Laying the bricks that form the risers. The four flat bricks in front are just to provide extra weight to hold the vertical bricks in place while I compact the sand behind them. |
| Everything in place and getting ready to sweep sand into the joints |
| Ready for action! |
Sunday, June 11, 2017
Front Porch
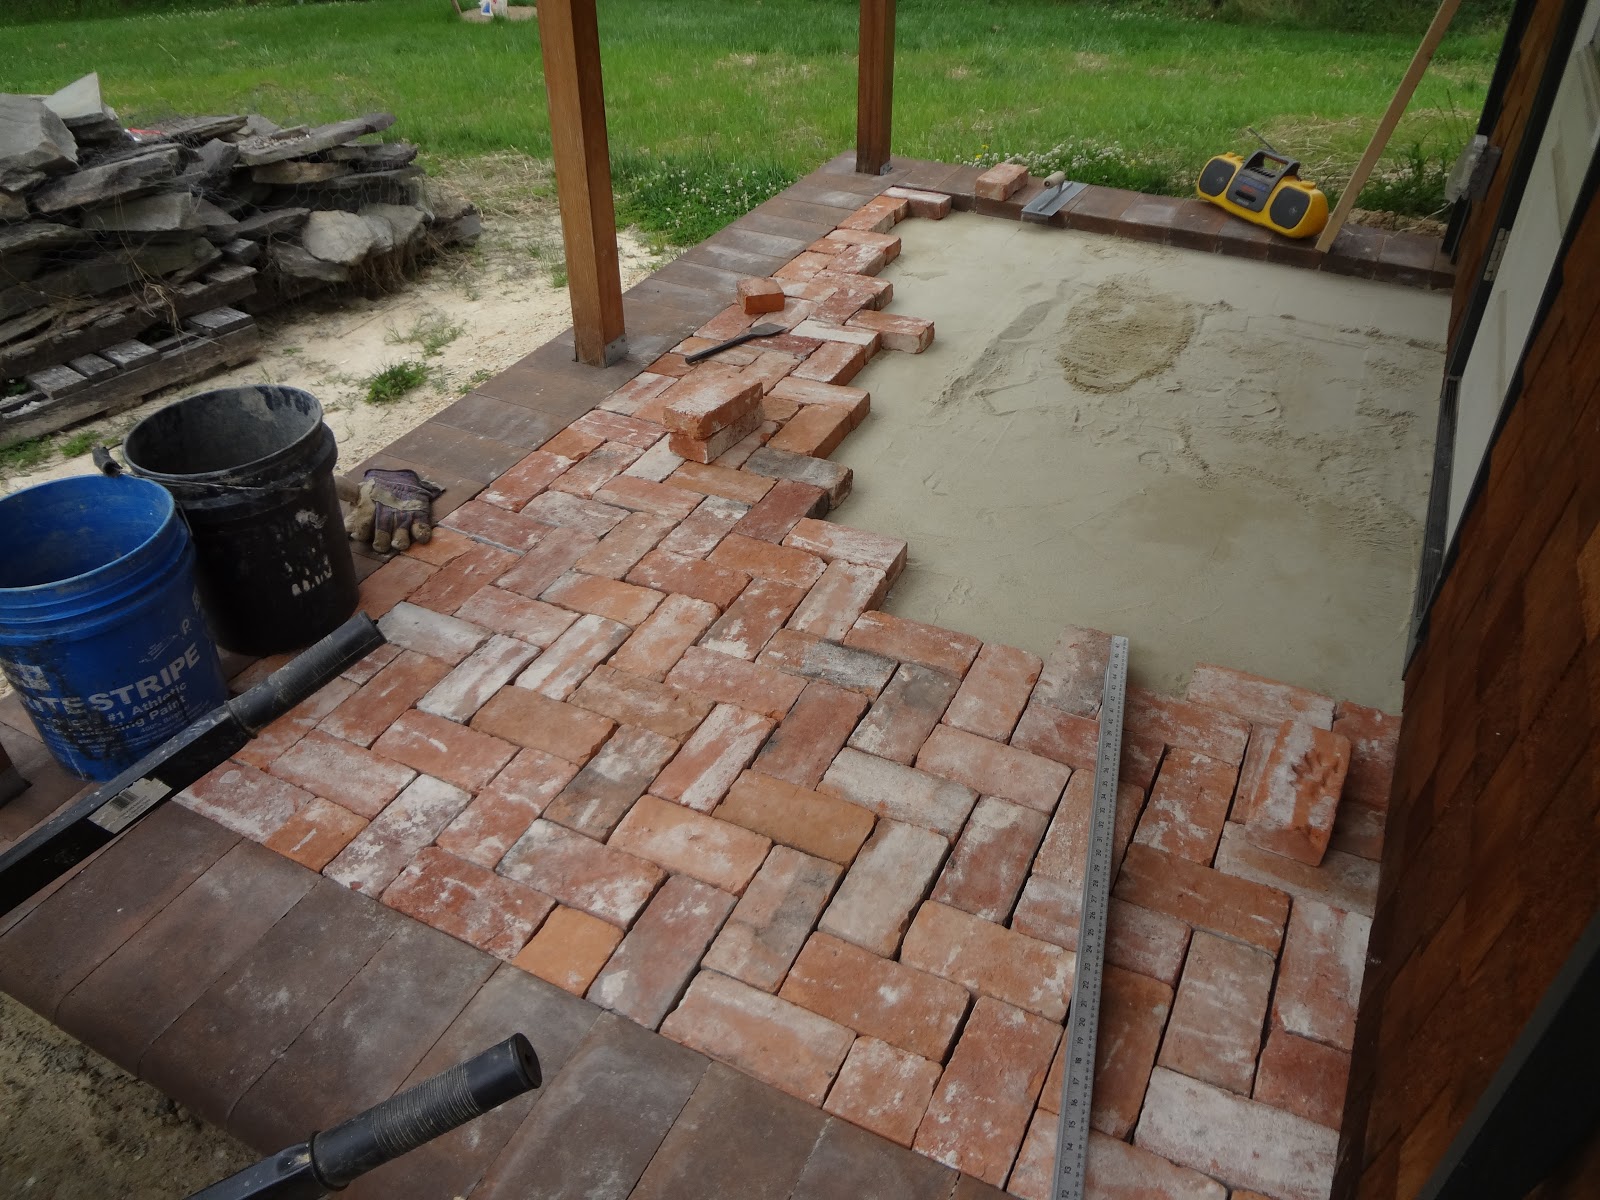
As much as I would like to delve into masonry work, I've been impatient to move things along, and there were going to be a couple tricky things involved with building the front porch. Time to hire a professional!
| All ready for a chair and a beverage! It feels pretty decadent to have an easy step into the house, rather than the various cobbled-up arrangements I've been using for the past two years! |
Saturday, June 10, 2017
Kitchen Cabinets
I'm not a fan of particle board. The main complaint is the glue that is used to stick all those little pieces of wood fiber together, which usually contains formaldehyde. I investigated a company that produces semi-custom, environmentally sustainable cabinets and found that one base cabinet would run about $1,500. Yikes, talk about sticker shock!
Well, for just two hundred dollars more, I got my entire kitchen at Ikea and saved money by transporting it home myself. (FYI, all the cabinets and counter-top in these photos fit in and on top of my Honda Fit in one trip!) That decision was made a little easier knowing that they've actually eliminated formaldehyde (or nearly so) from their products. See this link. In fact, the cabinets have no significant smell, unlike the other particle board furniture I bought in the past.
While I'm not a fan of Ikea's no-words instructions, I liked everything else about the experience of designing, buying and assembling and installing the cabinets:
Well, for just two hundred dollars more, I got my entire kitchen at Ikea and saved money by transporting it home myself. (FYI, all the cabinets and counter-top in these photos fit in and on top of my Honda Fit in one trip!) That decision was made a little easier knowing that they've actually eliminated formaldehyde (or nearly so) from their products. See this link. In fact, the cabinets have no significant smell, unlike the other particle board furniture I bought in the past.
While I'm not a fan of Ikea's no-words instructions, I liked everything else about the experience of designing, buying and assembling and installing the cabinets:
- I used Ikea's online planner and worked out a few details in the store with their kitchen experts before finalizing my order
- Once the order was placed, they rolled out all my stuff on three carts. They had everything on my order and nothing else--no going back to work things out
- Everything is cut and drilled to precise tolerances so everything fit perfectly
- I'm used to assemble-it-yourself companies including one extra of all the screws, fasteners, etc. Ikea counts everything exactly and there were no missing parts
- This sides of the cabinets are finished (white) so it is optional to add a finished panel to match the front style of the cabinets. Since my cabinet faces are off-white, I didn't even bother.
- The drawers and hinges work smoothly and have up-to-date soft-close technology (I paid extra for that)
- There are many options for the cabinet faces and counter tops, and I found one that I liked. I was particularly thrilled to find a solid oat laminated counter-top. I expected this to be hard to find and/or pricey, but not so.
![]() | |
| Starting from left to right, since this cabinet abuts | a wall. |
![]() |
| All cabinets installed |
![]() |
| All finished, almost. I'll be installing a curtain over the lower part of the pantry cabinet and the area under the sink. The curtain on the pantry is a nod to cost (doors are expensive) and convenience since I want to put a coat rack and shelf on the wall in front of the pantry that would have kept the door from opening all the way. The curtain under the sink saves the cost of a cabinet and maximizes space. The idea is that while you're in the kitchen, you slide open the curtain to have instant access to trash, compost and recycling. There are no doors to get in the way of what I consider to be the most under-considered aspect of the kitchen: waste. When you're done in the kitchen, close the curtain and hide the clutter. You'll also see that I don't have a built-in stove. Since this is really a guest house that I plan to live in for a few years before I build the "real house" I'll make do with a 2-burner counter-top induction stove and a large toaster oven. This article explains the benefits of induction. While they are pricey, that are super energy efficient, don't heat up the space in summertime, and have the instant-on/off of a gas stove without the explosion potential. (As a rule of thumb, I try to avoid technologies that explode.) |
Sunday, May 21, 2017
Adobe Floor - Top Layer
OK, I've done as much work as I can do before installing the kitchen cabinets, so it's time to lay in the finished layer of adobe floor.
![]() |
| The pour progressing nicely. Note the plastic on the walls to protect against splatters. |
![]() |
| My Cinderella moment: if your hand fits the print in the floor, you own the house! |
Subscribe to:
Posts (Atom)