I am SO looking forward to experiencing radiant heat! Think about it: warm feet, nearly constant temperatures with low energy input, no filters to change, no noisy and uncomfortable air blowing out of ducts, no worry about whether there is mold growing in your ducts: the advantages are many. And in a house this size, it is so simple: There is only one run of 250 feet of pipe, so no manifold and network of thermostats.
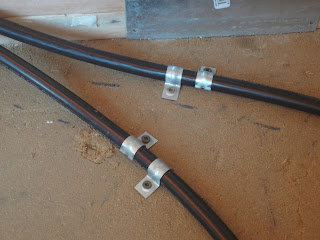
The 1/2" diameter PEX tubing was pretty easy to install, even though my friend and I were near the bottom of the learning curve. (This would be a tough task to accomplish solo.) We spent a couple hours learning that the 1 1/2" tapcon screws were having trouble holding in the adobe base layer, which is noticeably softer than concrete. Solution: 3" course-thread deck screws driven straight down with no pilot hole. Not one of those has pulled out. True, we didn't pull the tubing into quite as small a radius as we might have otherwise, but I don't think there will be any downside.
The only place were we doubled on clips up was where the tubes transition from the floor up the wall to the heater/pump assembly. You can see the blemish in the adobe where one of the tapcons pulled out.
So next step is to bury the tubes in a 1 1/2" layer of adobe. That thickness makes it easy to use 2x3s laid flat as screed boards. The entire adobe assembly consists of the base 4" layer, the next layer at 1 1/2", and the 1/2" finish layer for a total of 6". That's a lot of thermal mass! So I'll basically set the thermostat once in the fall and leave it untouched until the end of spring at the end of heating season.


No comments:
Post a Comment